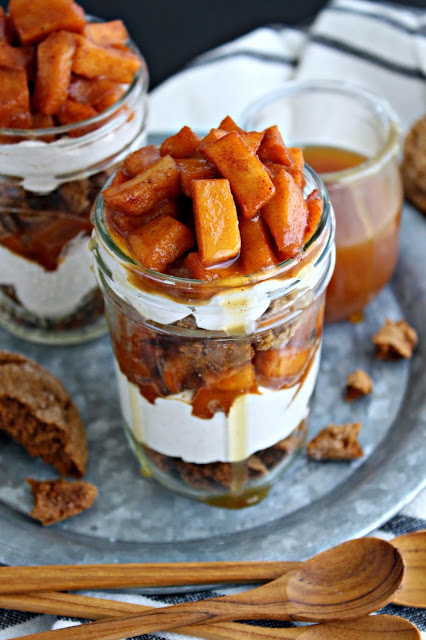
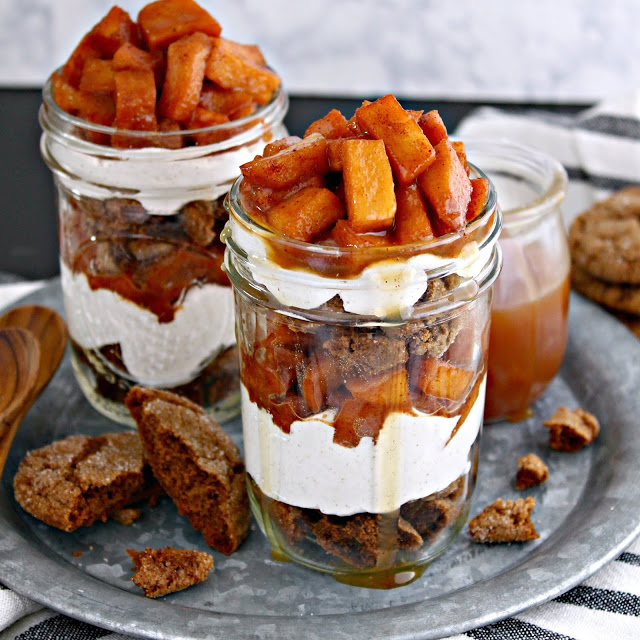
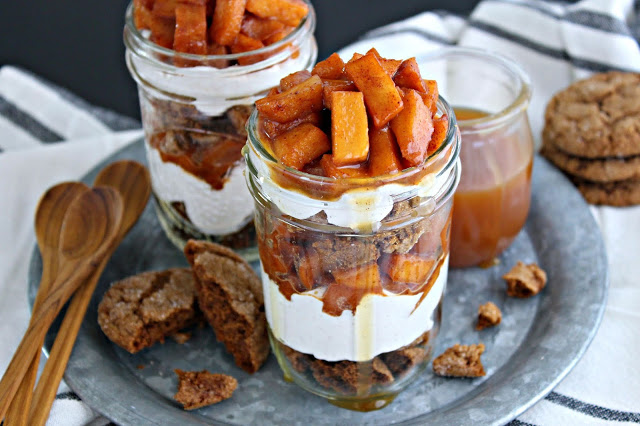
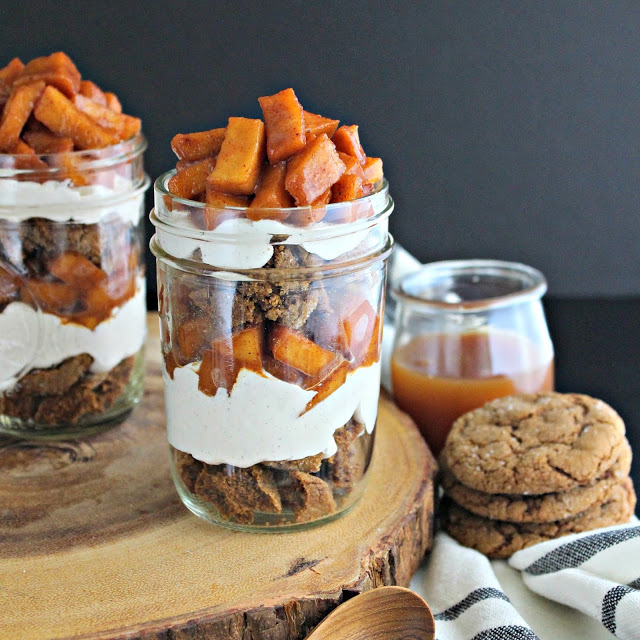
Apples, warm spices, salted caramel sauce, and molasses cookies come together in the perfect Fall dessert. Parfaits are a great way to create beautiful desserts for a crowd during the holiday season.
Uncategorized
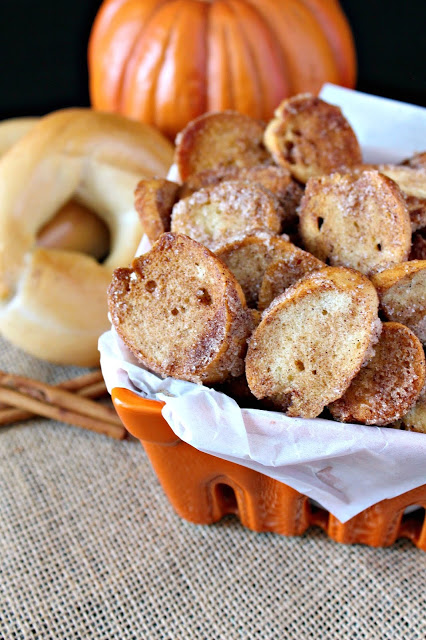
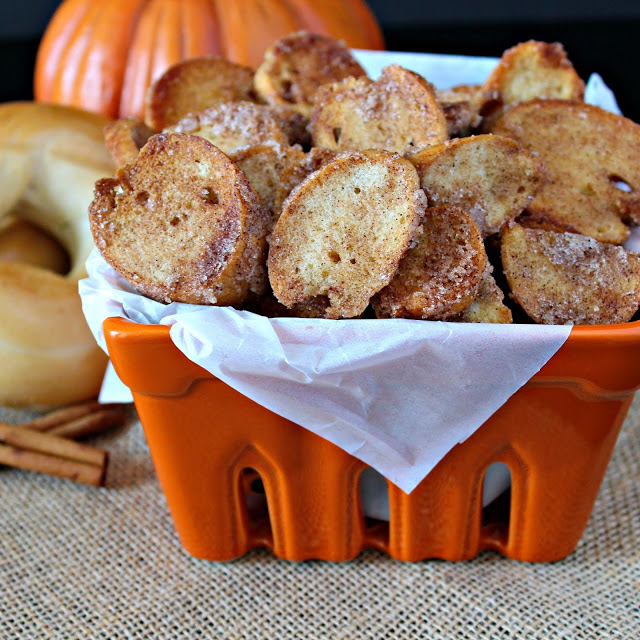
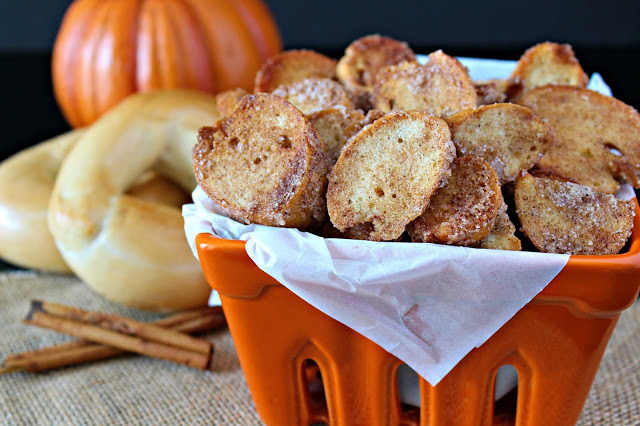
Pumpkin Spice Bagel Chips
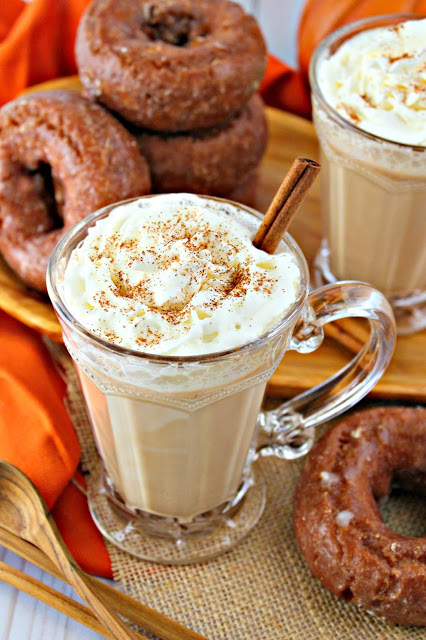
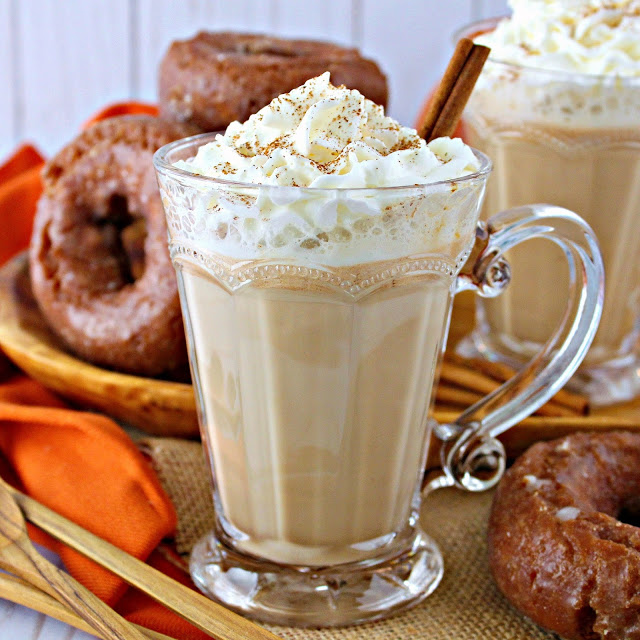
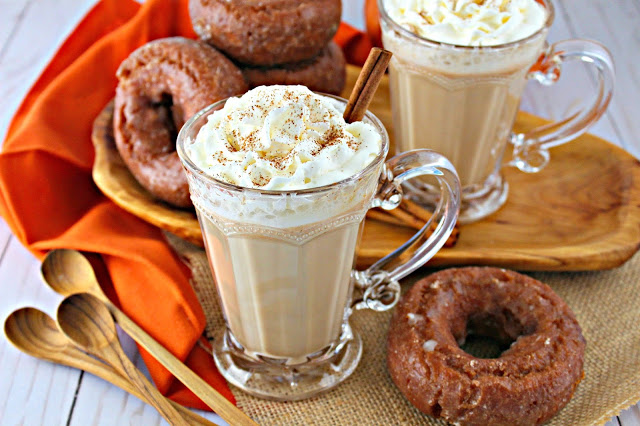
Easy Copycat Pumpkin Spice Latte
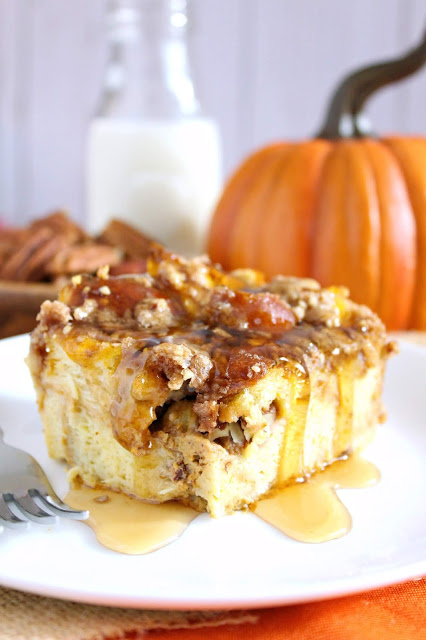
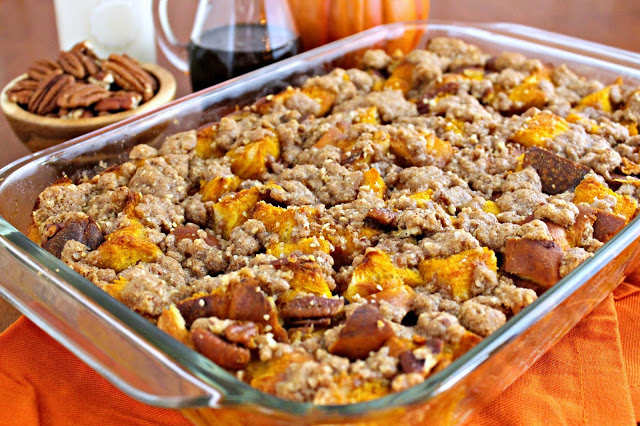
Pumpkin Pecan French Toast Casserole
Today is National Farmers Day – a day for us to acknowledge and appreciate the men, women, and families that work to help feed our community and country. Being a dairy farmer takes a 24/7 commitment every day of the year. Cows need to be milked and taken care of even on holidays. Today is about our appreciation and celebration of those who are devoted to providing the food that brings us together, especially dairy farmers for the milk and cheese.
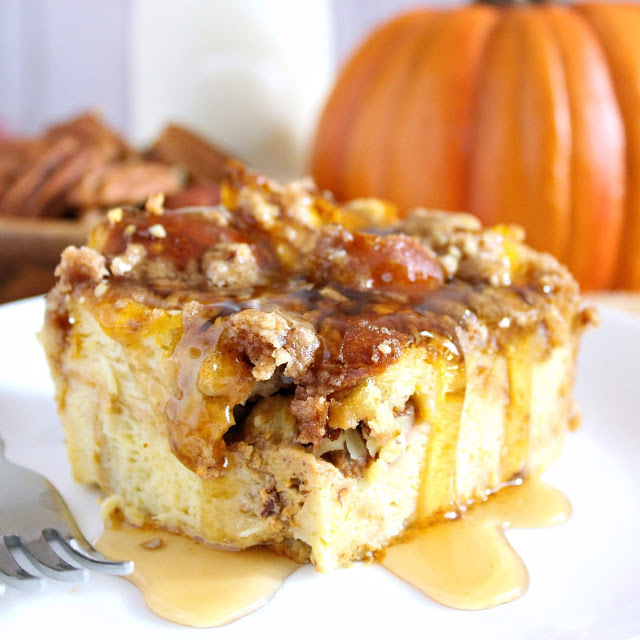
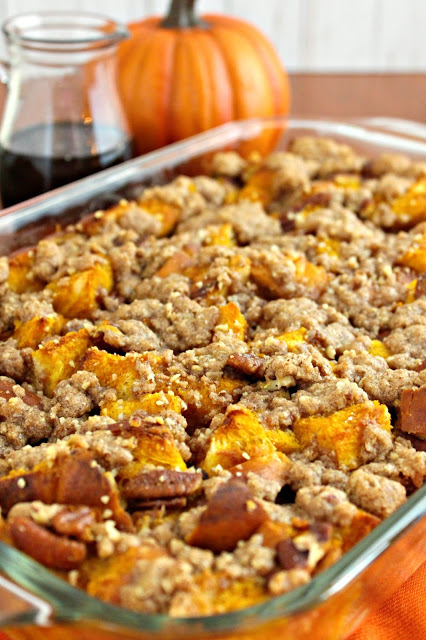
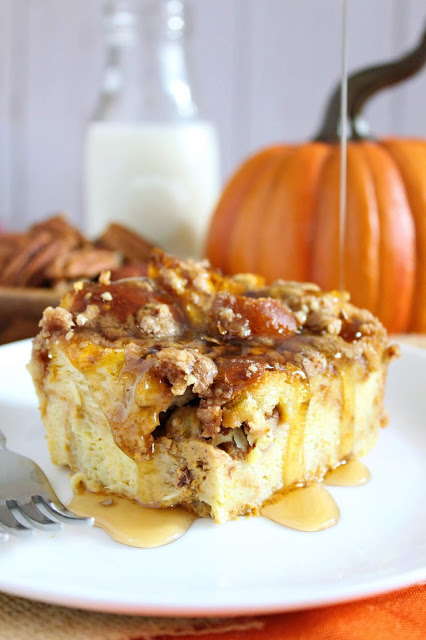
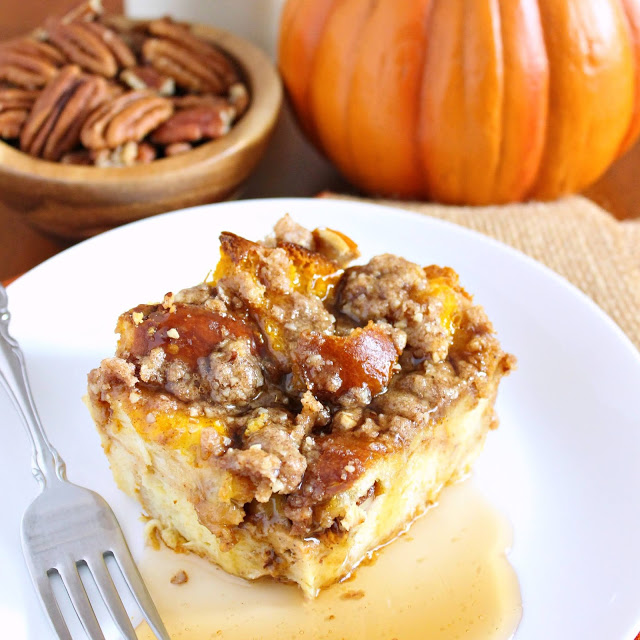
Pumpkin pecan french toast casserole uses both milk and heavy cream – it makes the most delicious combination for French toast. Brunch is my favorite meal because it can be sweet, savory, or both. This casserole is definitely a crowd-pleaser – just ask my family – and so easy because it can be made ahead of time.
I wanted to create a seasonal and delicious breakfast to share with my family and pumpkin is a favorite. This is an overnight casserole, so the bread has enough time to fully absorb the dairy mixture. Plus, the last thing we want to do is rush around the kitchen in the morning before breakfast. Everything is prepared in advance and just needs to be baked in the oven in the morning.
I try to teach my daughter where are food comes and to make sure she understands there are families that grow the food we find in the grocery store. We are lucky to have great farmers and local u-picks in the area as well. Strawberry, citrus, and blueberry season are our favorites.
We have visited farms for both Florida Dairy and Florida Beef too. I have met the farmers and their families, shared meals with them, picked their produce, toured their land, learned how they run the farm, and so much more. Be sure to thank a farmer today!
Did you know:
- Milk is the #1 food source for calcium, vitamin D and potassium.
- Florida is home to more than 125,000 dairy cows that collectively produce around 300 million gallons of milk a year.
- Most Americans live within 100 miles of a dairy farm, and 98% of Florida’s dairy farms are family owned and operated – most by second and third-generation farmers.
- Most of the dairy cows in Florida are Holsteins – the black and white cows.
- Each Florida dairy cow produces 6-8 gallons of milk each day and is milked 2-3 times per day.
Pumpkin Pecan French Toast Casserole
By Love and Confections
Ingredients
- 1 pound loaf challah bread
- 2 1/2 cups milk
- 1/2 cup heavy cream
- 1/4 cup granulated sugar
- 1/4 cup brown sugar
- 1 tablespoon vanilla
- 8 large eggs
- 1 cup pumpkin puree, not pumpkin pie filling
- 2 teaspoons pumpkin pie spice
- 1 teaspoon cinnamon
- 1/4 cup chopped pecans
Instructions
- Spray large 9 x 13 pan with cooking spray. Cube loaf and place half of the bread cubes into the pan. Sprinkle pecans over bread then place remaining bread cubes on top.
- In a medium sauce pan, heat the milk, cream and sugars until sugars are melted and milk is warm.
- In medium bowl, whisk together vanilla, eggs, pumpkin puree and spices. Slowly drizzle the warm milk into the eggs whisking constantly.
- Carefully pour mixture over bread, making sure it is completely coated. If necessary, use a spatula and move bread to make sure it is coated in the mixture.
- Cover pan with plastic wrap and refrigerate overnight. Prepare topping. Sprinkle topping on just before baking
- To bake: Remove casserole from refrigerator while oven heats. Heat oven to 350F. Bake, uncovered for 45-60 minutes, until center is set and no longer soggy.
- Let cool 10 minutes before serving. Serve with warm melted butter, maple syrup, powdered sugar, fruit of choice, or toasted chopped pecans.
Pecan Crumble Topping
Ingredients
- 1/4 cup all purpose four
- 1/3 cup light brown sugar
- 1/2 teaspoon cinnamon
- 3/4 teaspoon pumpkin pie spice
- 1/4 teaspoon salt
- 1/4 cup unsalted butter, cubed
- 1/4 cup pecan halves
Instructions
- Combine all ingredients in food processor. Pulse until it resembles course crumbs. Place in container with lid overnight in refrigerator. Sprinkle on casserole just before baking.
Best Root Beer Float Ice Cream
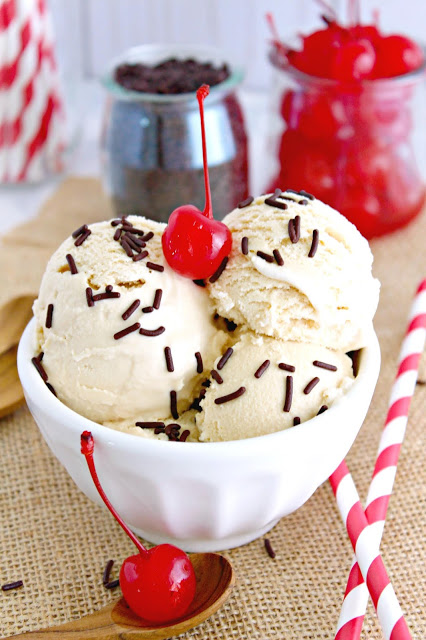
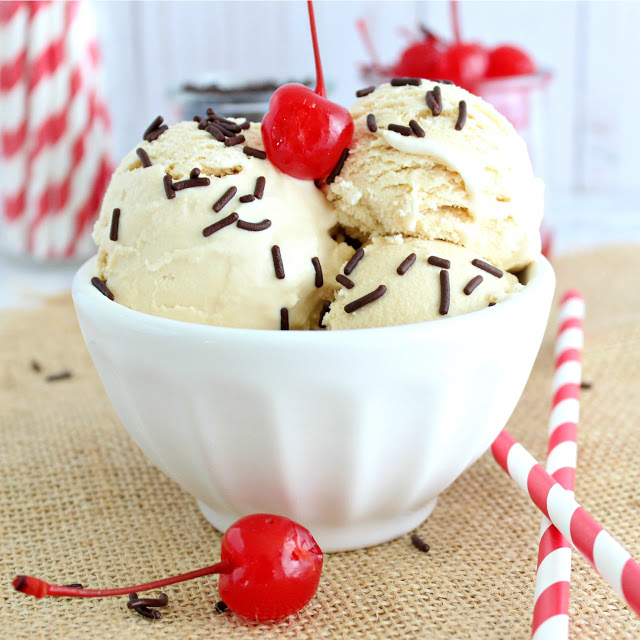
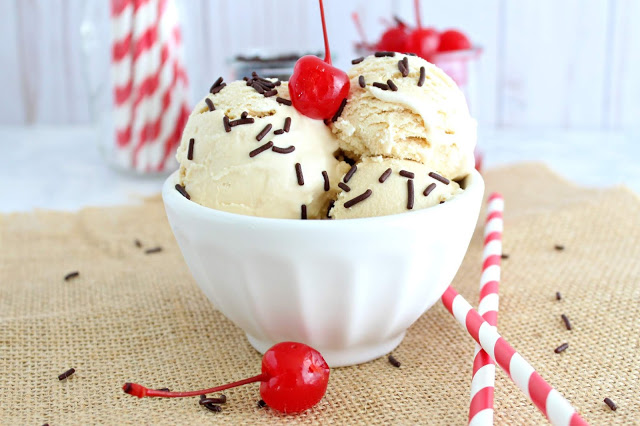
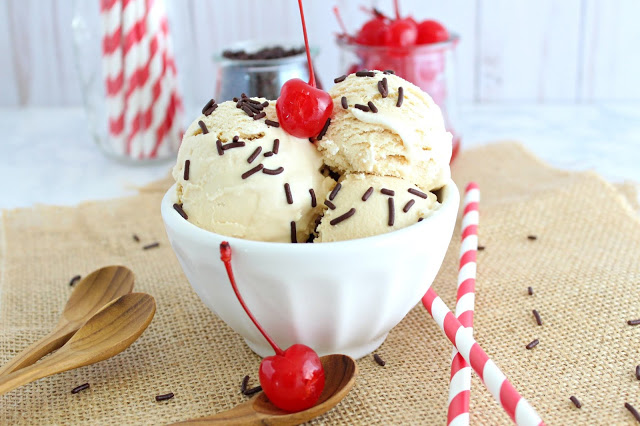
I love nostalgic treats, especially if they have to do with ice cream. Malts, milkshakes and floats are some of my favorite frozen indulgences. This Root Beer Float Ice Cream is the best of both worlds, combining a root beer float with delicious homemade ice cream. Don’t forget the whipped cream, hot fudge and cherry on top!
The local burger joint was always a favorite restaurant spot to visit growing up. My family would meet up with my best friend’s family on the weekends, grab burgers, fries & root beer floats, and share a meal. My favorite treat was the root beer float. Every few weeks the restaurant hosted a classic car show and we would wander through the parking lot looking at the pristine cars, sipping on floats.
I grew up with a love of root beer – from my dad – and birch beer – from my grandmother. Because of this love, I knew I wanted to craft the perfect ice cream. I couldn’t just freeze root beer because it would get too many ice crystals. Boiling it down also reduced the flavor. The best option is a root beer concentrate or candy flavoring. The tiny bottle packed a huge root beer punch and was the best choice for the ice cream.
A secret ingredient gives this ice cream a delicious and creamy taste, like an actual root beer float. We don’t have much Fall weather yet, so we are still enjoying this ice cream quite a bit.
Chocolate Sugar Cookie Coffin Boxes #HalloweenTreatsWeek
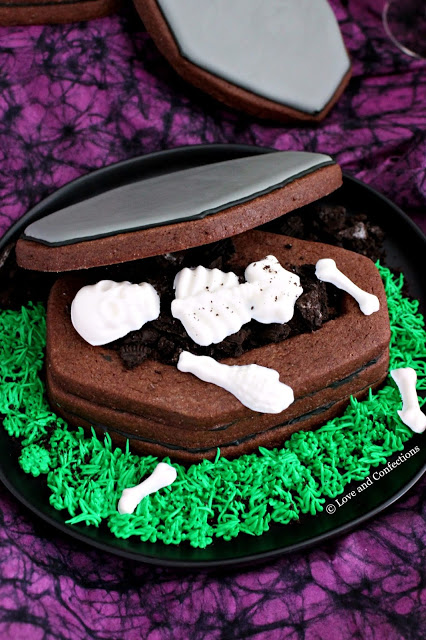
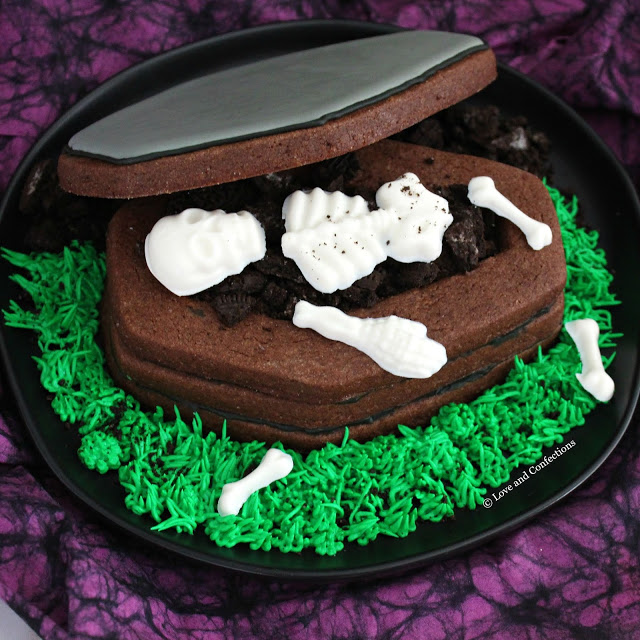
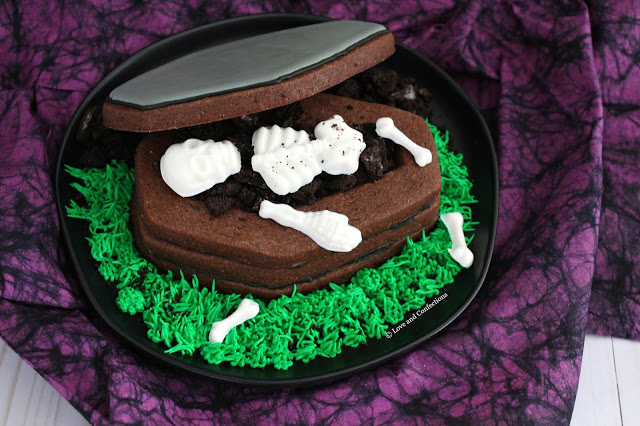
I love making fun cookie boxes and with Halloween on the way, what better cookie box then a coffin filled with creamy chocolate frosting, crumbled Oreo cookies, and a white candy skeleton.
This is actually the first time I tried this specific chocolate sugar cookie recipe. It’s from LilaLoa, who is an amazing cookie artist. The dough was okay, and I followed her directions explicitly. I opted to bake my dough after chilling – she has different ingredient measurements on her blog if you don’t want to chill the dough.
I found a large coffin cookie cutter at my craft store, which was perfect for the cookie boxes. For the inside cutout, you either cut it by hand, or use a smaller coffin or rectangle cutter. Ideally the dough won’t spread and you will be left with perfect shapes after baking. I am going to try and play around with my regular cookie recipe to see if I can make it into some different flavored dough for the next time.
I opted to fill my coffins with chocolate frosting. You can also use whipped chocolate ganache, or even chocolate pudding to make a dirt cake style cookie box – although I would only do that immediately before serving so you don’t get the cookies soggy.
The coffin is held together with a stiff royal icing tinted black. I opted for black simply because I didn’t have a dark enough brown, and didn’t want to over saturate the icing with food color. Part of the royal icing was tinted green for the grass – this looked really cute if you want to plate them up for presentation.
Wilton has some really cute chocolate molds, and their white candy melts, along with some Crisco, went into a double boiler for the molded skeletons. I prefer using a double boiler with all my chocolate and candy melts, because it allows me to see the product as it’s melting and not burn or overcook it.
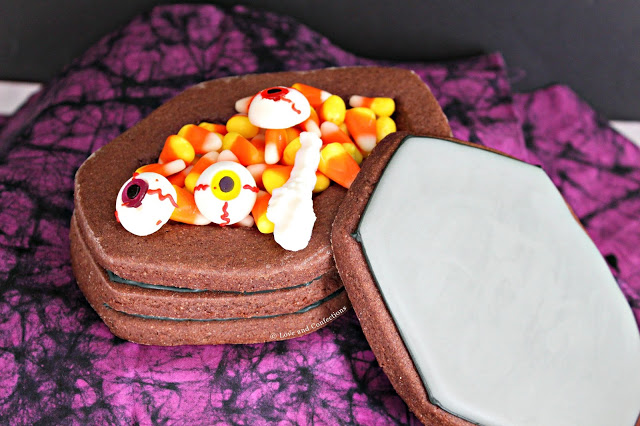
I made a few cookie coffin boxes with the dough recipe and filled one of them with candy corn and gummy eyeballs. You can use whatever is your favorite candy or dessert on the inside. These are also very large and meant to share, so grab some Halloween-loving friends and dig in!
Chocolate Sugar Cookie Coffin Boxes
By adapted from LilaLoa
Ingredients
- 1 cup unsalted butter, softened but not room temperature
- 1/4 cup vegetable shortening
- 1 1/2 cups granulated sugar
- 2 large eggs
- 1 teaspoon vanilla extract
- 1 teaspoon salt
- 3/4 teaspoon baking powder
- 2/3 cup unsweetened cocoa powder
- 3 cups all purpose flour
- Royal Icing
- Black and green food color
- White candy melts
- Crisco
- Oreo cookies
Instructions
- In bowl of stand mixer fitted with paddle attachment, cream butter, shortening and sugar together until well blended.
- Add eggs, vanilla, baking powder and salt and combine. Add in cocoa powder and flour. Mix until flour is completely combined. It will look very soft and sticky.
- Wrap dough in plastic wrap and chill minimum 8 hours.
- Heat oven to 375F. Prepare cookie sheets with parchment or silicone mats.
- Roll dough onto lightly floured surface. Cut 6 large coffins and place on baking sheet. Chill 10 minutes. Cut 6 more coffins and then cut the center out to create a hollow box once assembled. Place on cookie sheet and chill 10 minutes.
- Bake each tray individually for 8-10 minutes. Cool on tray for 10 minutes then move to rack to cool completely
- Prepare royal icing according to package directions.
- Assemble coffins by piping royal icing around the edge of 3 base cookies. pipe around the edge of 3 center cookies. Stack the cookies: base cookie-icing-center cookie-icing center cookie.
- Frost or pipe on the top of the cookie and let dry overnight.
- Melt candy melts according to package directions. Add 2-3 teaspoons Crisco to candy melts until you get the right consistency. Spoon or pipe into molds and set in freezer for 10-15 minutes. Pop out of mold onto parchment and reserve until decorating.
- Fill with chocolate frosting, top with Oreo cookie crumbs and white chocolate skeleton. Pipe grass if desired.
Chocolate Frosting*
By Love and Confections
Ingredients
- 3/4 cups unsalted butter, softened (1 1/2 sticks)
- 1 3/4 cups powdered sugar
- 1/3 cup cocoa powder
- 1/8 teaspoon salt
- 1 teaspoon vanilla extract
- 2-3 tablespoons heavy cream
Check out the amazing #HalloweenTreatsWeek recipes from our bloggers today!
- Ghostly Sweet and Salty Snack Mix from Big Bear’s Wife
- Donut Monsters from Mrs Happy Homemaker
- Brownie Bottom Candy Explosion Cheesecake from I am a Honey Bee
- Sugar Cookie Coffins from Love and Confections
- Little Monsters Halloween Mocktails from 4 Sons R Us
- Reeses Halloween Cookie Bars from A Blender Mom
- Candy Corn Cupcakes from Daily Dish Recipes
- Paranormal Parfaits from Eat Move Make
- Easy Day of the Dead Cake from Pint Sized Baker
- Buttercream Bat Wing Cupcakes from Kudos Kitchen
- Vanishing Candy Corn Cocktails from The Baking Fairy
- Wicked Zombie Trifle from Who Needs A Cape?
- Monster Party Halloween Cupcakes from Lady Behind The Curtain
- Candy Corn Vodka Truffles from A Kitchen Hoor’s Adventures
- Ghost Cupcakes from Mildly Meandering
- Monster Mash Piñata Cupcakes from Strawberry Blondie Kitchen
- Frankenstein Crispy Cereal Treats from The Redhead Baker
- Graveyard Pudding from The Beard and The Baker
- Day of the Dead Black Buttercream Cake from House of Nash Eats
- Halloween Chocolate Sugar Cookies from Savory Experiments
- Easy Caramel Apples from Katie’s Cucina
- Bag of Bones Scary Snacks from For the Love of Food
Happy Halloween! We hope you’re ready for a spooktacular event as we celebrate Halloween with the first annual #HalloweenTreatsWeek event hosted by Angie from Big Bear’s Wife. This haunting week-long event is filled with fantastic Halloween treats, recipes and some frightfully fun giveaways.

For our very first #HalloweenTreatsWeek event we have 30 talented bloggers that are sharing their favorite Halloween recipes throughout the week! There are going to be over 100 Halloween themed recipes shared during this year’s #HalloweenTreatsWeek and we can’t wait for you to see them all!
Plus, don’t forget that we have 5 (five) great giveaways for you this week thanks to our amazing sponsors!
Scroll down to take a look!
Prize #1
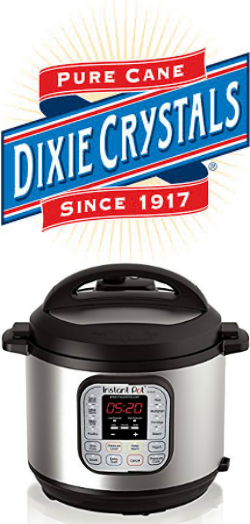
Prize #2
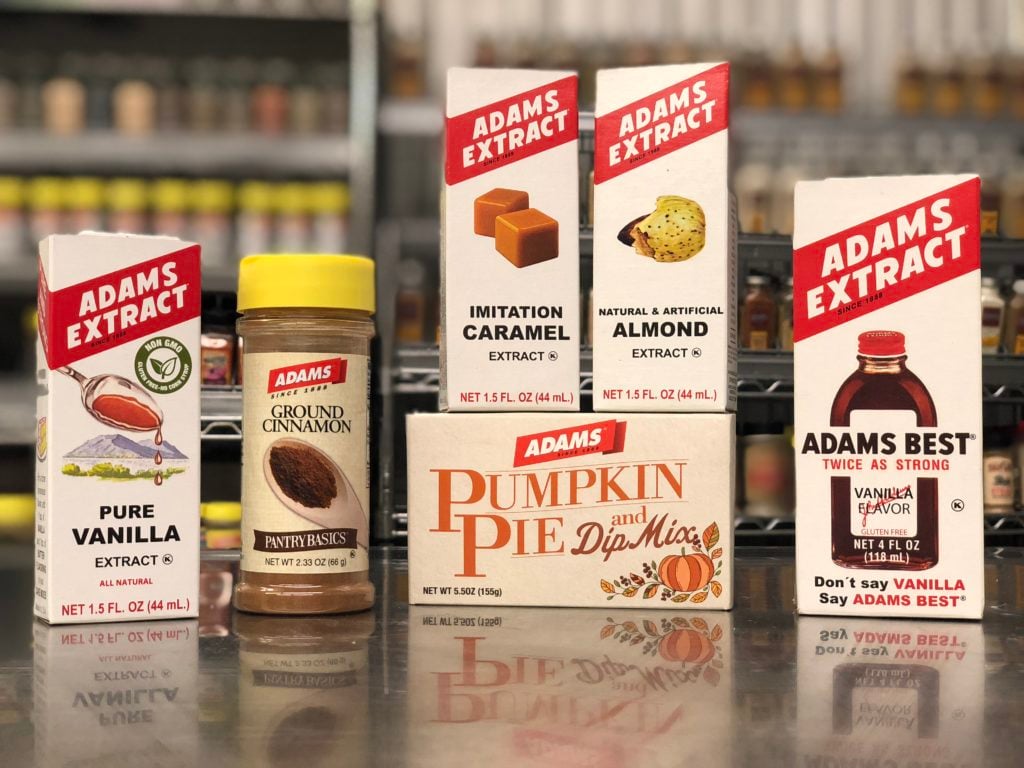
Prize #3
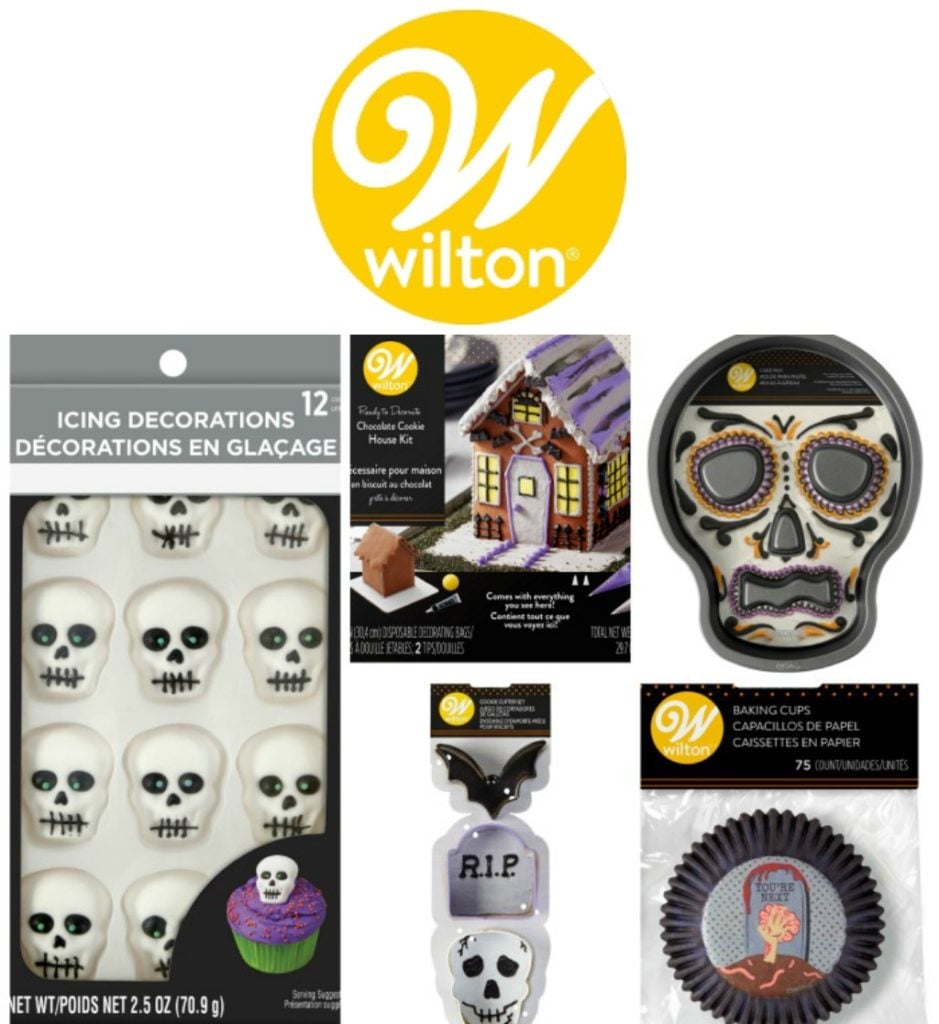
Prize #4
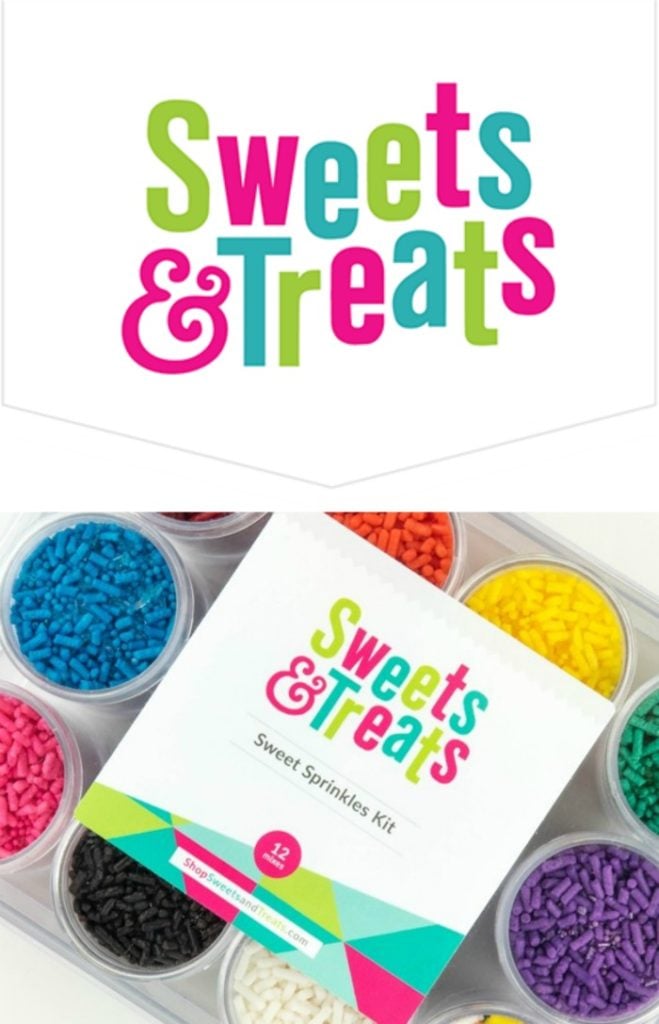
Prize #5
Disclaimer: These posts and recipes are part of the week-long event, #HalloweenTreatsWeek but all opinions are 100% mine! We would like to Thank our amazing sponsors: Dixie Crystals, Adam’s Extract, Wilton, Sweets and Treats Shop and Treat Street USA ! These wonderful sponsors provided the prize packs for our giveaways and also sent samples and products to the #HalloweenTreatsWeek bloggers to use in their recipes.
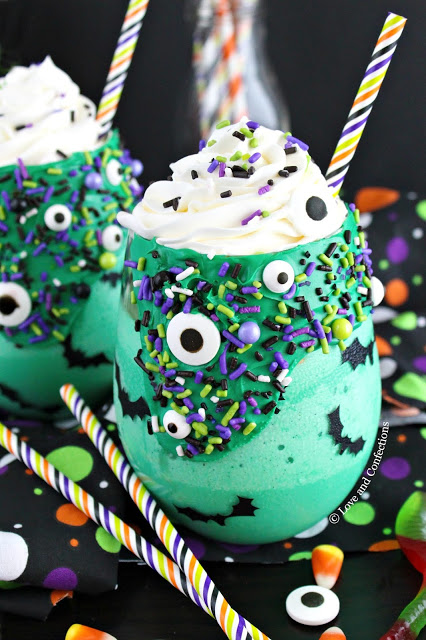
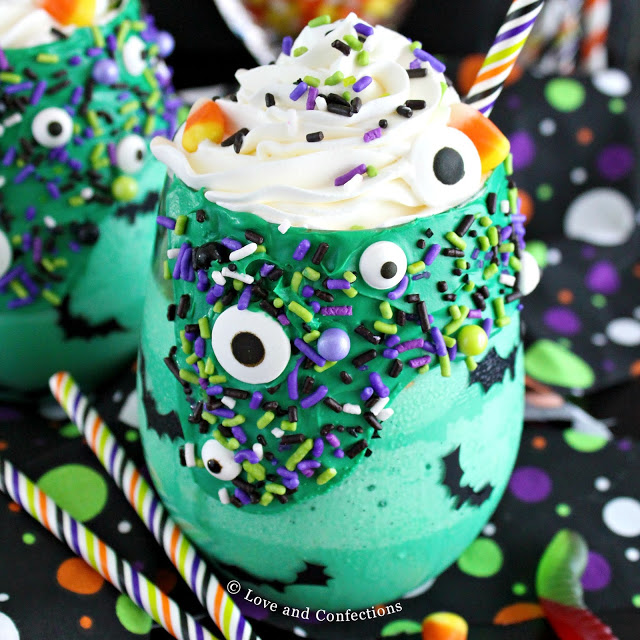
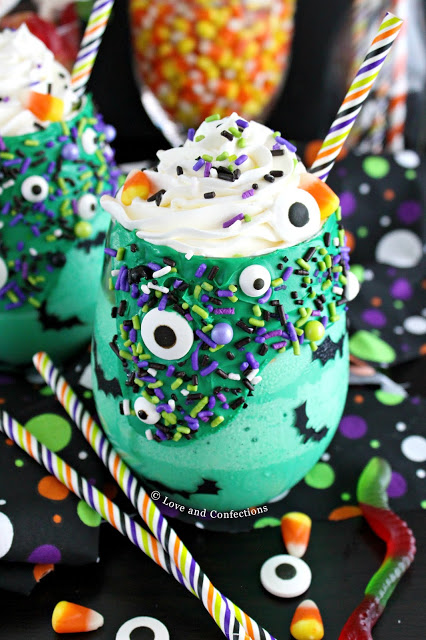
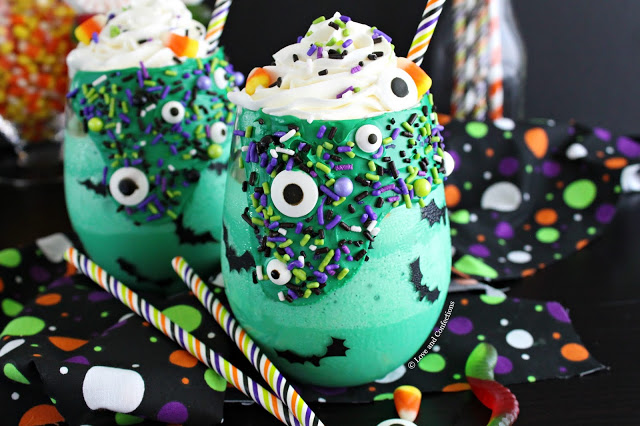
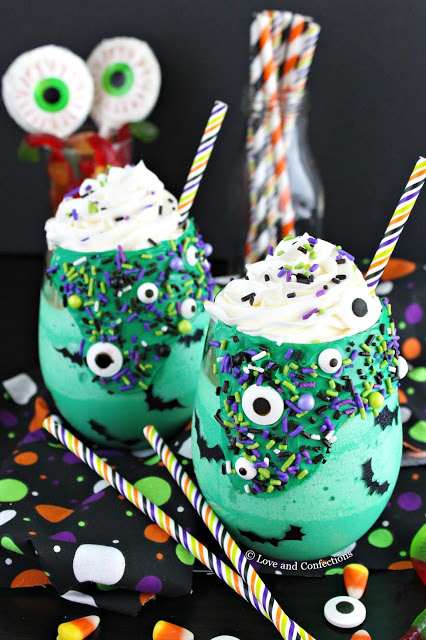
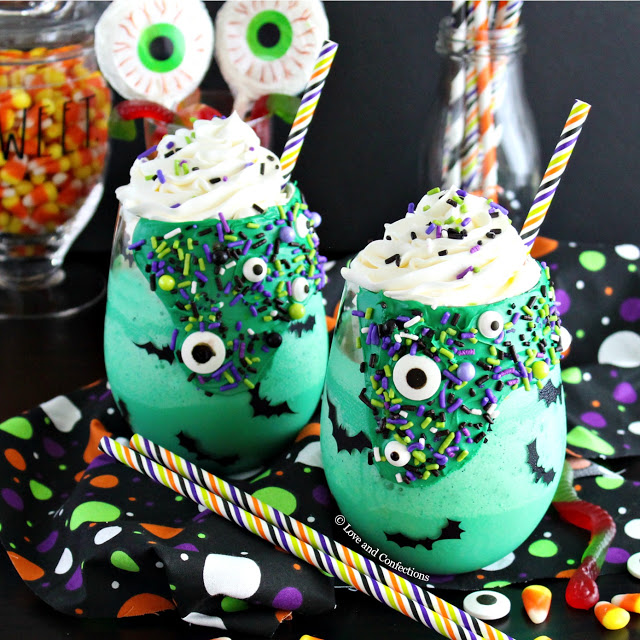
Halloween Green Monster Milkshakes
A trick I use to get all the fun decorations to stick is to use store-bought frosting. I colored mine green to match the milkshake and the sprinkles. You can totally customize it, which is the beauty of these monster milkshakes.
You can either used freshly whipped cream or whipped topping for the milkshakes. Don’t forget extra sprinkles on the top too!
Halloween Green Monster Milkshake
By Love and Confections
Ingredients
- 1/4 cup white store-bought frosting
- Green gel food color
- Halloween sprinkles and candy eyes
- 1 cup milk
- 3 cups vanilla bean ice cream
Instructions
- Mix frosting and a few drops of green food color until desired color. Using an offset spatula, spread frosting around the rim of two glasses. Add sprinkles and candy eyes. Refrigerate 5-10 minutes.
- In high-powered blender, combine milk, ice cream and a few drops of green food color. Blend until combined. Pour into glasses, top with freshly whipped cream and more sprinkles.
Purple Velvet Halloween Layer Cake #HalloweenTreatsWeek
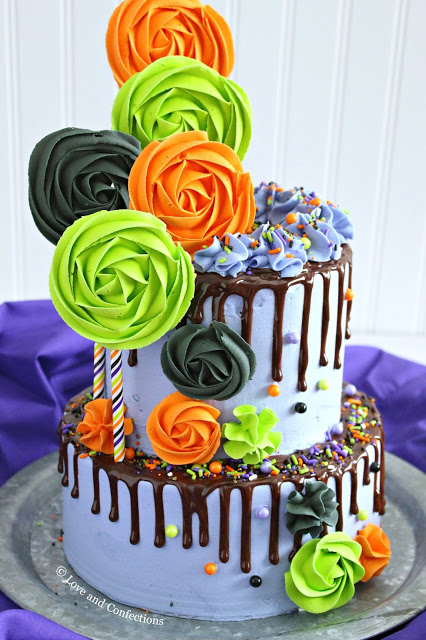
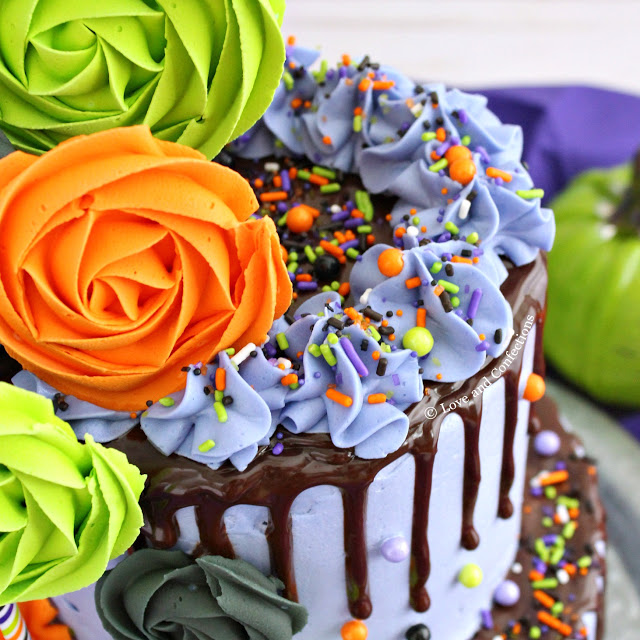
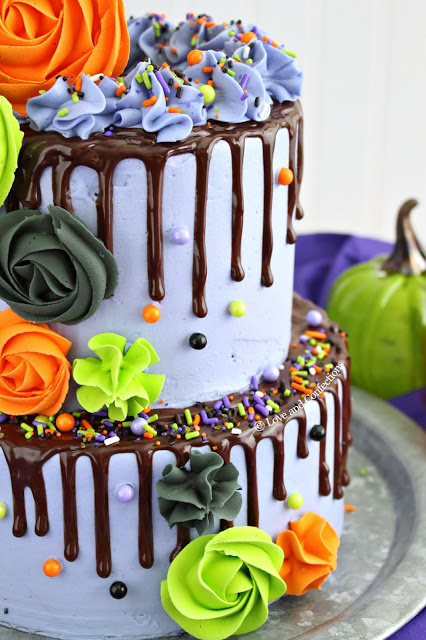
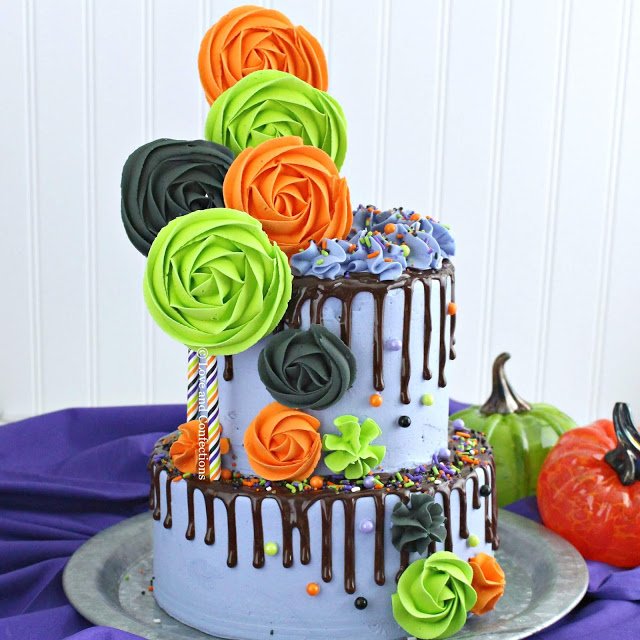
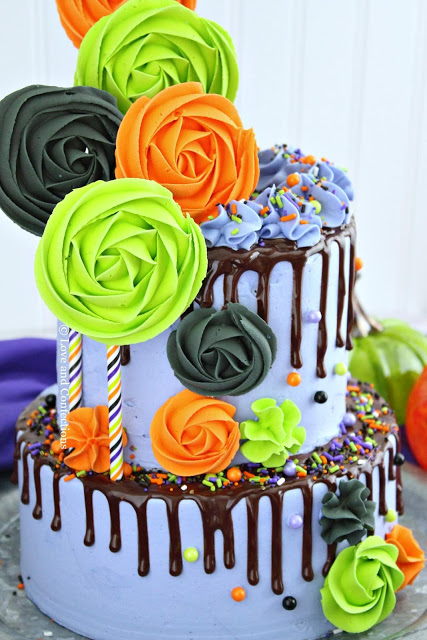
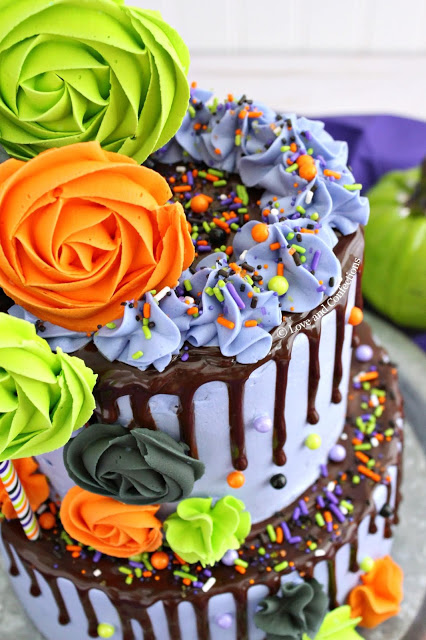
This cake is everything! I am seriously in love with it and can’t stop staring. Purple velvet cake, vanilla buttercream, royal icing decorations, chocolate drip and SPRINKLES! It was such a fun cake to put together and I love the vibrant colors.
It’s funny how you get an idea in your head and then are in total awe when it comes to life – I love that feeling!! This cake was inspired by Sweets & Treats Boutique “Monster Mash” sprinkle mix. I knew I wanted to make a layer cake, but didn’t have a set design in mind until I received the sprinkles, and this idea was born.
If you hadn’t already known, I totally have a sprinkle (and paper straw) hoarding problem. Sprinkle mixes are the best, especially when they are holiday themed and inspire a whole cake! I loved this sprinkle mix from the moment I unwrapped it and knew this would be a fun cake from the start.
There were a few elements I definitely wanted to have and a purple velvet cake was top priority. I wanted a show-stopping cake for this year’s Halloween celebration, like my Black Velvet Spider Cake from a few years back. Holiday cakes are so much fun to make and my purple velvet is definitely up there on the favorites list. I totally forgot to cut a piece to show you the inside; but don’t worry because I already have plans for another purple velvet cake soon and then you can see the beautiful color.
You can’t miss the bright and colorful rosette lollipops. My original intention was to make meringues, but I live in Florida where it is hot and humid still, and meringues might not have held up as I would have liked. Royal icing to the rescue! I made a batch of stiff royal icing, separated it into three bowls and colored them black, lime green, and orange.
I wasn’t sure regular lollipop sticks would hold them up and am glad I made the decision to use some matching paper straws I had on hand (self-proclaimed straw hoarder). The colors matched perfectly, which was great because I staggered the decorations and some straws were actually on the outside of the cake. The straws also held up really well to the weight of the royal icing.
I adore chocolate drips on cakes – here’s my Candy Corn Layer Cake from last year – and knew I needed that chocolate contrast with all the bright colors. It is an easy element to add to any cake and gives it a whimsical touch.
The vanilla buttercream is very easy to work with and the color matched the little pearl candies from the sprinkle mix perfectly. I didn’t want to go too dark with the buttercream, because the inside is already a dark purple, and then you wouldn’t be able to see the chocolate drip as well.
Purple Velvet Halloween Layer Cake
By adapted from Joy of Baking
Ingredients
- 2 cups plus 2 tablespoons cake flour
- 1 teaspoon salt
- 1 1/2 teaspoons Dutch-processed cocoa powder
- 1/2 cup (1 stick) unsalted butter, room temperature
- 1 1/2 cups granulated sugar
- 2 large eggs, room temperature
- 2 teaspoons vanilla extract
- 1 cup buttermilk, room temperature
- Purple gel food color
- 1 teaspoon white distilled vinegar
- 1 teaspoon baking soda
Instructions
- Heat oven to 350F. Prepare cake pans with parchment on bottom and grease sides with baking spray
- In medium bowl, sift together flour, salt and cocoa powder. Set aside
- In stand mixer bowl, or large bowl with hand mixer, beat butter and sugar on medium to medium-high until light and fluffy, approximately 3-5 minutes. Add eggs one at a time until fully combined. Scrape down the bowl after each egg addition.
- Combine vanilla and buttermilk. While mixer is on low, alternate flour and buttermilk, in 5 additions, beginning and ending with the flour. Add preferred amount of gel food coloring (advised no more than 1/2 teaspoon, preferably 1/4 or less). Scrape down sides of bowl to make sure color is combined throughout.
- In a small bowl, combine the vinegar and baking soda and let fizz. Quickly mix or fold into batter.
- Divide between cake pans (2 if using 8-inch, 3 if using 6-inch) and bake for 23-25 minutes, or until a toothpick inserted into the center comes out clean. Cool in pans for 10 minutes, then transfer to wire rack to cool completely. Can be made a day in advance, wrapped tightly in plastic wrap and refrigerated.
Vanilla Buttercream
By Love and Confections
Ingredients
- 2 cups vegetable shortening
- 2 cups unsalted butter, room temperature
- 1 teaspoon clear vanilla extract
- 10 cups Dixie Crystals Confectioners Powdered Sugar, sifted
- pinch salt
- 3-4 tablespoons milk
- Purple gel food color
Instructions
- In bowl of stand mixer fitted with paddle attachment, beat shortening for 3-5 minutes. Add in butter, and vanilla and beat to combine.
- Sift powdered sugar. Slowly add to butter mixture, alternating with milk 1 tablespoon at a time, depending on desired consistency. If frosting is too yellow from butter, add a tiny drop of purple food color from the end of a toothpick and whip.
- If not using immediately, transfer to bowl, cover with plastic wrap and store in the refrigerator. Bring to room temperature and re-whip before using.
- You can choose to layer and crumb coat in white or purple. I used white, then added purple for the final buttercream. Please be advised of the amount of food color used. Add amount at your discretion. It may change consistency of buttercream and stain tongue if too much is added. I used around 5-8 drops.
Chocolate Drip
Ingredients
- 1 cup dark chocolate chips
- 1/2 cup heavy cream, plus 2 tablespoons
Instructions
- In microwave-safe measuring cup, heat heavy cream for 45-60 seconds, until just before boiling. Add chocolate chips and let sit for 2 minutes. Stir with spatula until combined. If not thin enough for a drip and still warm, add in 1-2 tablespoons heavy cream. If necessary, heat ganache for additional 10-15 seconds in microwave then add 1-2 tablespoons heavy cream. Place in uncut piping bag.
Cake Assembly
- Level cakes if necessary. Place a small amount of frosting on cake board to secure cake. Place bottom layer on cake board. Add frosting to cake and level with offset spatula (approx 1/3 – 1/2 cup) Place second layer on top (if using three 6-inch layers) and repeat.
- Place last layer on top upside-down and apply a crumb coat* over cake. Place in freezer for 15-20 minutes. Repeat with additional cake if making two tiers.
- Frost top and sides and smooth with cake scraper/comb. Place in freezer for 15-20 minutes to chill. Repeat with additional cake if making two tiers.
- Place dowels in bottom layer to support top tier. Stack cakes. Make ganache drip. Drip chocolate over bottom tier and top tier. Let sit for 5 minutes.
- Fill piping bag fitted with 1M tip and pipe frosting along the top. Add sprinkles on top of both tiers.
- Add royal icing lollipops** and additional royal icing decorations. Serve or refrigerate then bring to room temperature before serving.
* Crumb coat is a thin layer of frosting applied after stacking the cake, so the crumbs do not show when the final layer of frosting is applied.
** Prepare royal icing lollipops minimum 24 hours before needed, preferably 48 hours. Use Wilton meringue and instructions on container. Divide icing and color using gel food color. Place parchment on sheet pans with sides, lay straws down and pipe rosettes using 1M piping tip. Vary size and colors as needed.
Check out the amazing #HalloweenTreatsWeek recipes from our bloggers today!
Check out the amazing #HalloweenTreatsWeek recipes from our bloggers today!
- Pumpkin Patch Graveyard Eclair from Big Bear’s Wife
- Pumpkin Empanadas from Pook’s Pantry
- Malted Milk Ball Spider Cookies from Pastry Chef Online
- Pumpkin Patch Cupcakes from Mrs Happy Homemaker
- Purple Velvet Halloween Layer Cake from Love and Confections
- Eyeball Jello Shots from I am a Honey Bee
- Monster Fudge from 4 Sons R Us
- Pumpkin Cheesecake Bars from A Blender Mom
- Vampire Ice Cream Floats from Daily Dish Recipes
- Graveyard Pie from Eat Move Make
- Easy Skeleton Cake Pops from Pint Sized Baker
- Swiss Meringue Spooky Skull from Kudos Kitchen
- Candy Corn Cheesecake Mousse from The Spiffy Cookie
- Melting Witch Candy Popcorn Halloween Party Mix from Lady Behind The Curtain
- Dragon’s Eggs from A Kitchen Hoor’s Adventures
- Graveyard Dip from Mildly Meandering
- Eyeball Cake Balls from Strawberry Blondie Kitchen
- White Chocolate Ghost Cupcakes from The Beard and The Baker
- Halloween Chocolate Blossom Sprinkle Cookies from House of Nash Eats
- Rice Krispie Haunted House from Savory Experiments
- Halloween Snack Mix from Katie’s Cucina
- Monster Rice Krispies from For the Love of Food
Happy Halloween! We hope you’re ready for a spooktacular event as we celebrate Halloween with the first annual #HalloweenTreatsWeek event hosted by Angie from Big Bear’s Wife. This haunting week-long event is filled with fantastic Halloween treats, recipes and some frightfully fun giveaways.

For our very first #HalloweenTreatsWeek event we have 30 talented bloggers that are sharing their favorite Halloween recipes throughout the week! There are going to be over 100 Halloween themed recipes shared during this year’s #HalloweenTreatsWeek and we can’t wait for you to see them all!
Plus, don’t forget that we have 5 (five) great giveaways for you this week thanks to our amazing sponsors!
Scroll down to take a look!
Prize #1

Prize #2

Prize #3

Prize #4

Prize #5

Disclaimer: These posts and recipes are part of the week-long event, #HalloweenTreatsWeek but all opinions are 100% mine! We would like to Thank our amazing sponsors: Dixie Crystals, Adam’s Extract, Wilton, Sweets and Treats Shop and Treat Street USA ! These wonderful sponsors provided the prize packs for our giveaways and also sent samples and products to the #HalloweenTreatsWeek bloggers to use in their recipes.
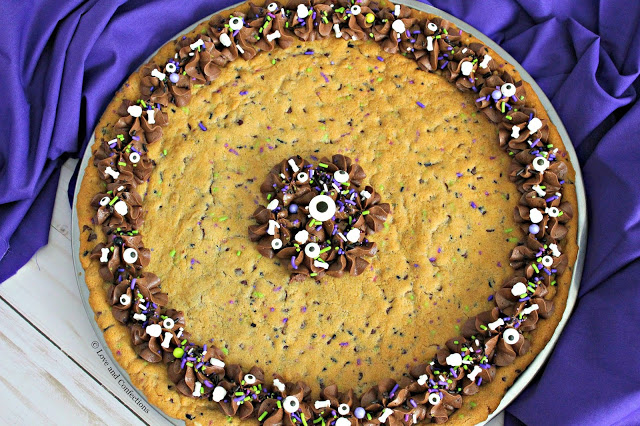
Halloween Sprinkle Cookie Cake #HalloweenTreatsWeek
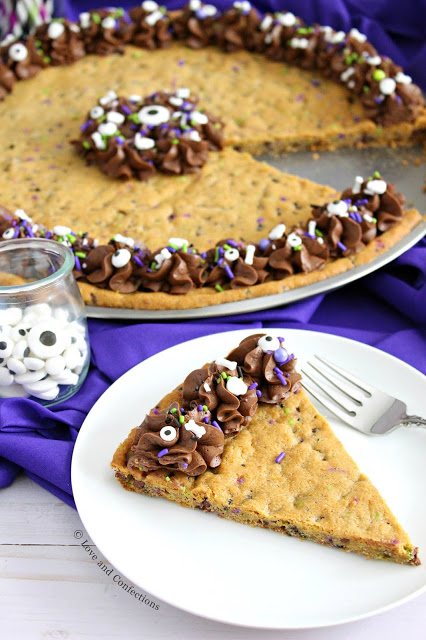
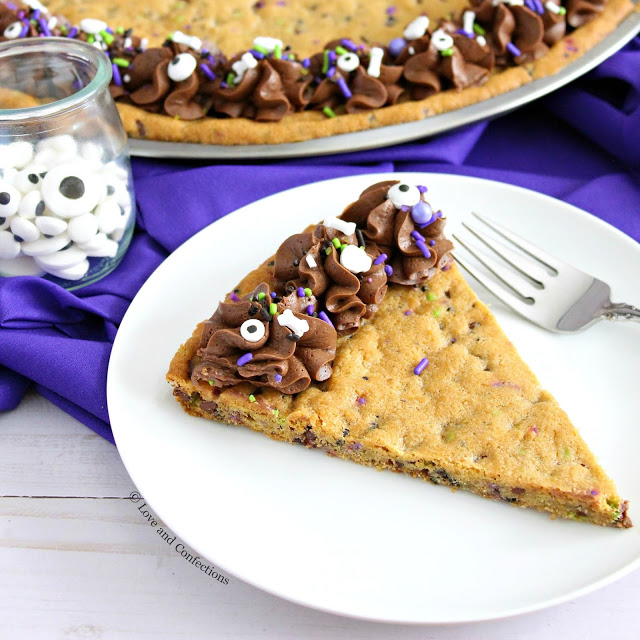
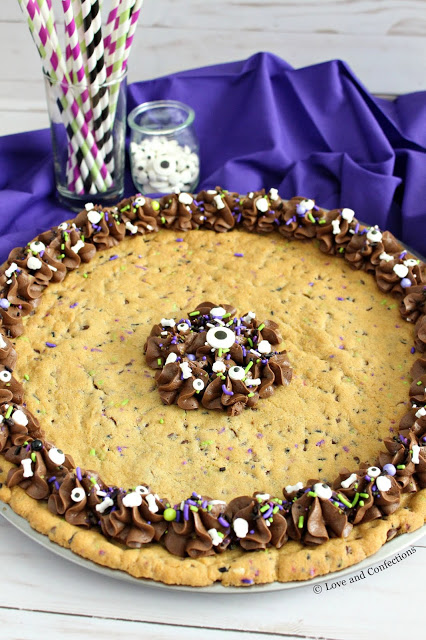
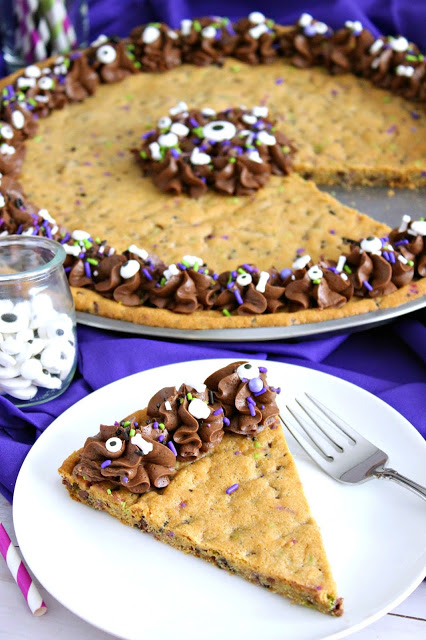
Happy October! I love Halloween so much and am very excited to participate in this year’s #HalloweenTreatsWeek hosted by my friend Angie from Big Bear’s Wife. Angie loves Halloween just as much as I do and I cannot wait to share all of my sweet treats with you this week!! First up is a Halloween Sprinkle Cookie Cake.
Cookie cakes have always been a favorite treat of mine. I love being able to bake and decorate it with frosting and sprinkles – which I usually don’t for regular chocolate chip cookies. Themed cookie cakes are especially fun. I added a bright and festive sprinkle mix into this batter for some extra color and flair.
I love the Dragon Dreams sprinkle mix from sponsor Shop Sweets & Treats, and knew it would be a great addition to my cookie cake. The sprinkles are used both inside the cookie dough, and on top of the frosting. Sprinkles are my favorite thing to hoard. With all the fun sprinkle mixes out there, there are so many options for treats.
The delicious chocolate frosting is easy to whip up and a dream to work with. Only a few ingredients are needed for an easy decorative element. I chose chocolate for the frosting – because chocolate! – but feel free to omit it replace the cocoa with powdered sugar, and color the frosting. I think the chocolate showcases the sprinkles best, and because I had white sprinkles and candies, chocolate was perfect for everything.
In addition to the fun sprinkle mix, I used Wilton Candy Eyes and Wilton Skull & Bone Sprinkle Mix. They add both a cute and spooky vibe and are perfect on the chocolate frosting. Little L&C loved looking at the eyeballs and bones and sprinkles when the cake was finished. No tricks needed for this treat. Have a happy Halloween!
Halloween Sprinkle Cookie Cake
Adapted from Sally’s Baking Addiction
Ingredients
- 2 cups all-purpose flour
- 2 teaspoon cornstarch
- 1 teaspoon baking soda
- 1 teaspoon salt
- 3/4 cups unsalted butter, room temperature
- 3/4 cups light brown sugar, packed
- 1/4 cup granulated sugar
- 1 large egg, room temperature
- 2 teaspoons vanilla extract
- 1 cup mini semi-sweet chocolate chips
- 1/4 cup sprinkle mix
Instructions
- Heat oven to 350F. Lightly spray 14-inch pizza pan with cooking spray.
- In medium bowl, whisk together flour, cornstarch, baking soda and salt. Set aside
- In large bowl or bowl of stand mixer with paddle attachment, cream butter, brown sugar and granulated sugar until light and fluffy, 2-3 minutes. Add in egg and vanilla and combine. Scrape down sides of bowl.
- While mixer is on low, add in dry ingredients and incorporate. While on low, add in chocolate chips and sprinkles and mix until just combined.
- Place cookie dough into pizza pan and using a spatula or your hands, flatten dough until it barely reaches the edges (dough will spread). Make sure your pan is big enough, or the dough will overflow in the oven. You can also use a deep dish pan.
- Bake for 20-24 minutes, or until lightly brown. Cool cookie cake completely before decorating.
Chocolate Frosting
By Love and Confections
Ingredients
- 3/4 cups unsalted butter, softened (1 1/2 sticks)
- 1 3/4 cups powdered sugar
- 1/3 cup cocoa powder
- 1/8 teaspoon salt
- 1 teaspoon vanilla extract
- 2-3 tablespoons heavy cream
Instructions
- In large bowl with hand blender, or bowl of mixer with whisk attachment, combine butter, powdered sugar, and cocoa on low until combined. Scrape down sides of bowl.
- Once incorporated whip on medium low and add in heavy cream, 1 tablespoon at a time. Scraping down sides of bowl as necessary.
- Whip on medium to medium-high until light and fluffy, 3-5 minutes.
- Using a spatula, scrape down the sides of the bowl to make sure all ingredients have been mixed in. Place frosting in piping bag fitted with a 2D piping tip.
- Pipe around edge of cookie cake and in center. Top with sprinkle mix, skull & bone sprinkles, and candy eyes.
Check out the amazing #HalloweenTreatsWeek recipes from our bloggers today!
- Melting Ghost Hot Chocolate from Big Bear’s Wife
- Day of the Dead Mexican Chocolate Cupcakes from Pook’s Pantry
- Devilish Halloween Deviled Eggs from Pastry Chef Online
- Candy Corn Layer Cake from ReciPEAs
- Cauldron Cupcakes from Mrs Happy Homemaker
- Black Magic Skull Cakes from Sugar Dish Me
- Frankenstein’s Monster Pudding Cups from I am a Honey Bee
- Halloween Sprinkle Cookie Cake from Love and Confections
- Chocolate Dipped Brownie Pops for Halloween from Southern From Scratch
- Creepy Crawly Dirt Cup Pudding Parfaits from 4 Sons R Us
- “Guts” Cinnamon Rolls from A Blender Mom
- Creepy Eyeball Donuts from Daily Dish Recipes
- Mummy Bites from Eat Move Make
- Monkey Brain Bread from Pint Sized Baker
- Halloween Cookie Pizza from Grumpy’s Honeybunch
- Boo Berry Pie from Kudos Kitchen
- Monster Donuts from The Baking Fairy
- Boogeyman Brew from Who Needs A Cape?
- Purple People Eater Thumbprints from The Spiffy Cookie
- Hocus Pocus Halloween Decorated Pretzels from Lady Behind The Curtain
- Black and Orange Cookies from Karen’s Kitchen Stories
- Skeleton Popsicles from A Kitchen Hoor’s Adventures
- Monster Mash Cake from Mildly Meandering
- Graveyard Skillet Brownies from Strawberry Blondie Kitchen
- Blood-Red Pomegranate Margarita from The Redhead Baker
- Halloween Snoballs from The Beard and The Baker
- Halloween Chocolate Cherry Hand Pies from House of Nash Eats
- Halloween Dunkaroo Dip from Savory Experiments
- Bloody Eyeball Cherry Cheesecake Cupcakes from Katie’s Cucina
- Eye Scream Sundae from For the Love of Food
Happy Halloween! We hope you’re ready for a spooktacular event as we celebrate Halloween with the first annual #HalloweenTreatsWeek event hosted by Angie from Big Bear’s Wife. This haunting week-long event is filled with fantastic Halloween treats, recipes and some frightfully fun giveaways.
For our very first #HalloweenTreatsWeek event we have 30 talented bloggers that are sharing their favorite Halloween recipes throughout the week! There are going to be over 100 Halloween themed recipes shared during this year’s #HalloweenTreatsWeek and we can’t wait for you to see them all!
Plus, don’t forget that we have 5 (five) great giveaways for you this week thanks to our amazing sponsors!
Scroll down to take a look!
Prize #1

Prize #2
Prize #3

Prize #4

Prize #5

Disclaimer: These posts and recipes are part of the week-long event, #HalloweenTreatsWeek but all opinions are 100% mine! We would like to Thank our amazing sponsors: Dixie Crystals, Adam’s Extract, Wilton, Sweets and Treats Shop and Treat Street USA ! These wonderful sponsors provided the prize packs for our giveaways and also sent samples and products to the #HalloweenTreatsWeek bloggers to use in their recipes.
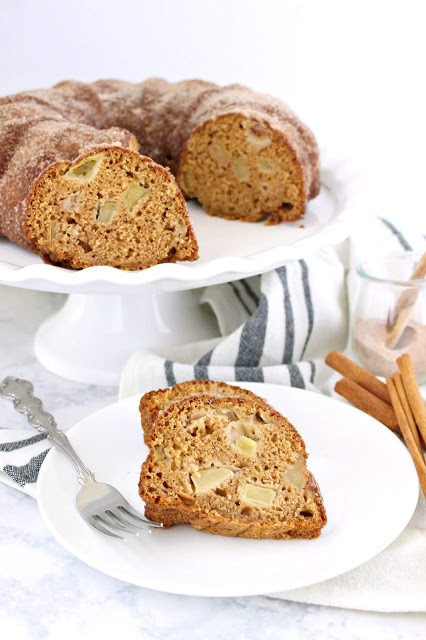
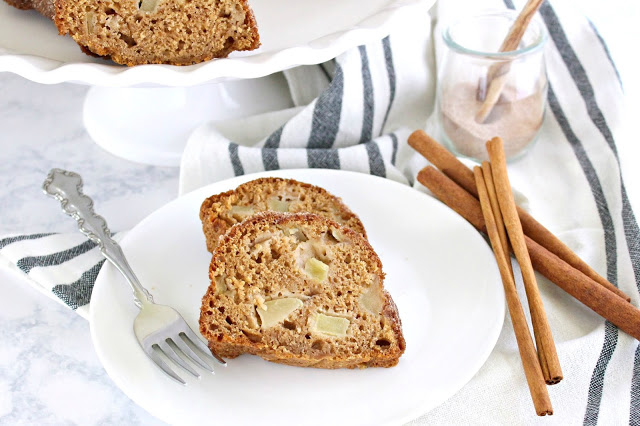
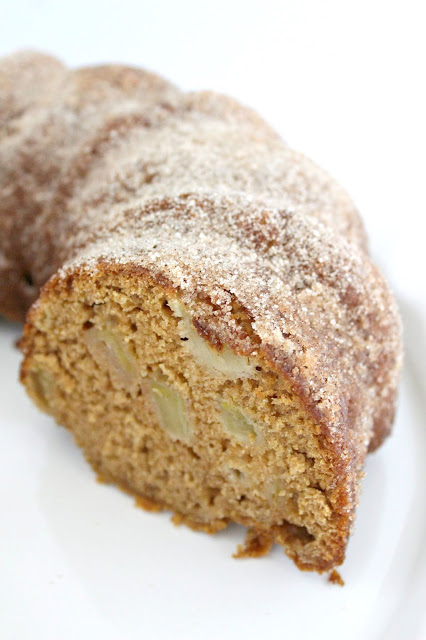
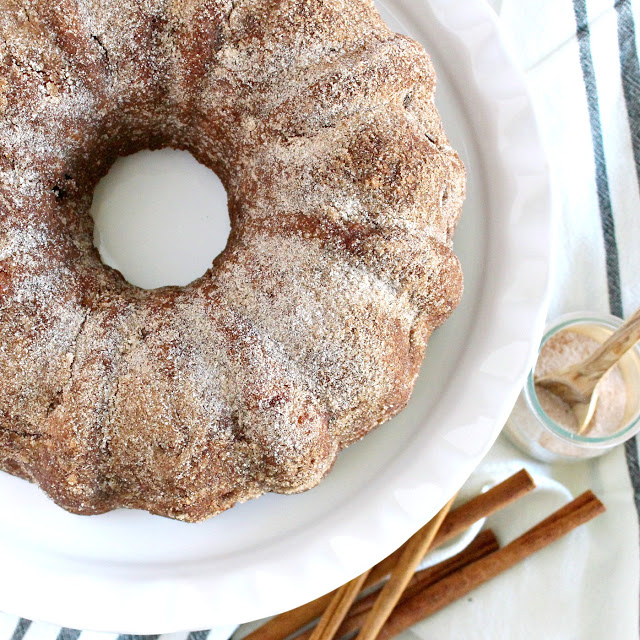
Apple Cider Spiced Donut Cake #AppleWeek
I have had apple cider donuts from the store or donut shops before, but I hadn’t had a fresh, made-to-order one until last year on my visit to Vermont. Cold Hollow Cider Mill is now one of my favorite spots in Vermont.
The hot made-to-order donuts are out of this world, and the freshly-pressed cider is like none other. I would visit Vermont in a heartbeat just to go to back Cold Hollow Cider Mill again. While on vacation, we loved it so much we went to the cider mill twice in the same week!
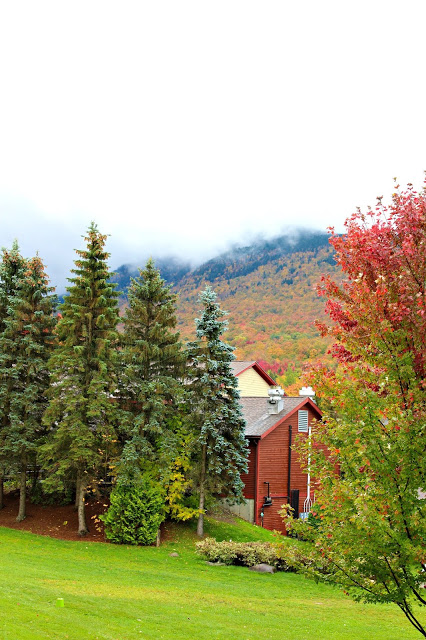
That Vermont trip was breathtakingly beautiful and so memorable. Mr. L&C and I drove all over Northern Vermont and had fun exploring.
We visited Cabot, the cider mill, a few apple orchards, fun restaurants, did wine & cider tastings, took a gondola to the top of Jay Peak (we could see Canada from the top), and more. Apple picking and the cider mill were probably my favorite experiences, since I had never picked apples before.
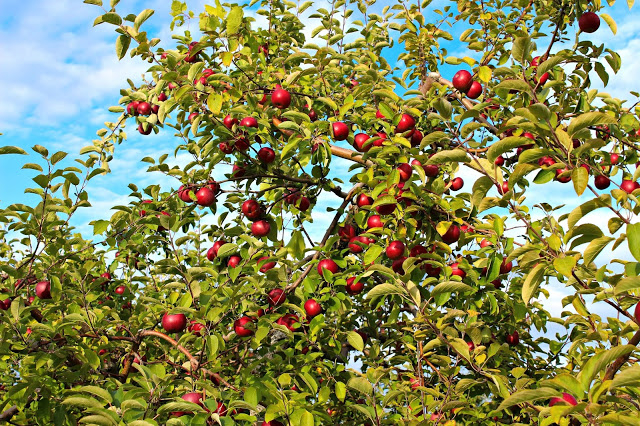
I cannot wait to take Little L&C apple picking for the first time. Here in FL we have strawberries, blueberries and citrus, so she has been picking those since she was a baby.
Apples are next on my list for her. Hope you have a delicious Fall and make this cake for your family, especially if you are lucky enough to pick apples!
Apple Cider Spiced Donut Cake
By slightly adapted from BakedbyRachel.com
Ingredients
- 1 cup apple cider
- 2 large eggs, room temperature
- 1 teaspoon vanilla extract
- 2 3/4 cups all purpose flour
- 3/4 cups Dixie Crystals Extra Fine Granulated Sugar
- 3/4 cups Dixie Crystals Light Brown Sugar
- 1 1/2 teaspoon baking powder
- 3/4 teaspoon baking soda
- 1/2 teaspoon salt
- 2 teaspoons cinnamon
- 2 medium apples, peeled, cored and diced
- 1-2 tablespoons flour
- 1/4 cup Dixie Crystals Extra Fine Granulated Sugar
- 1/2 teaspoon ground cinnamon or apple pie spice
- 1-2 tablespoons butter, melted
Instructions
- Heat oven to 350F. Prepare bundt pan with baking spray
- In a large measuring cup, whisk the cider, eggs and vanilla together until combined. Set aside.
- In the bowl of your stand mixer, or a large bowl, combine flour, granulated sugar, brown sugar, baking powder, baking soda, salt and cinnamon. Using either the paddle attachment or a hand mixer, slowly add the liquid while mixing on low, until just combined.
- Place diced apples in a medium bowl and toss with 1-2 tablespoons flour. Fold into cake batter then pour into prepared pan.
- Bake for 35-45 minutes, or until a skewer inserted into the center comes out clean. Cool in pan for 5 minutes, then turn out onto rack.
- In a small bowl, combine granulated sugar and cinnamon or apple pie spice. Place cooling rack onto parchment paper. Sprinkle all over with cinnamon sugar. If sugar is not sticking, use pastry brush and brush cake with butter, then top with cinnamon sugar.
Here are some supplies used for this recipe:
Saturday Recipes:
- Apple Bourbon Pork Tenderloin with Butternut Squash by Girl Abroad
- Apple Butter Cheesecake Tart by Soulfully Made
- Apple Cheesecake Breakfast Quesadillas by 4 Sons R Us
- Apple Cinnamon Cake by Kate’s Recipe Box
- Apple Cider Spiced Donut Cake by Love and Confections
- Apple Cinnamon Oat Bars by Daily Dish Recipes
- Apple Crisp Breakfast Bowl by Shockingly Delicious
- Apple Fennel and Beet Salad by A Day in the Life on the Farm
- Apple Hand Pies with an Oatmeal Crust by The Freshman Cook
- Apple Nachos by Jolene’s Recipe Journal
- Apple Peanut Butter Ebelskivers by A Kitchen Hoor’s Adventures
- Apple Tortas Fritas (Argentinean Fry Bread with Apples) by Palatable Pastime
- Apple Oatmeal Pancakes by Simple and Savory
- Apple Rosette Frangipane Tart by Culinary Adventures With Camilla
- Applesauce Oatmeal Bread With Vanilla Honey Butter by Cooking With Carlee
- Caramel-Stuffed Apple Butter Snickerdoodles by The Redhead Baker
- Chicken Salad with Apples, Cranberries, and Pecans by Karen’s Kitchen Stories
- Cinnamon Apple Iced Oatmeal Cookies by Jonesin’ For Taste
- Harvest Apple Cakelets with Maple Drizzle by Everyday Eileen
- Pink Peppercorn & Curry Leaf Chicken Salad by Faith, Hope, Love & Luck
- Stuffed Apples with Cheddar and Sausage by Strawberry Blondie Kitchen
Disclaimer: Thank you AppleWeek Sponsors: Swiss Diamond, Nordic Ware, Envy Apples, Imperial Sugar, The Spice House, Rodelle Vanilla, Flahavan’s Irish Oats and Nairn’s for providing the prizes free of charge. These companies also provided the bloggers with samples and product to use for AppleWeek recipes. All opinions are my own. The AppleWeek giveaway is open to U.S. residents, age 18 & up. All entries for the winner will be checked and verified. By entering you give the right to use your name and likeness. The number of entries received determines the odds of winning. Seven (7) winners will be selected. The prize packages will be sent directly from the giveaway sponsors. The AppleWeek Bloggers are not responsible for the fulfillment or delivery of the prize packages. Bloggers hosting this giveaway and their immediate family members in their household cannot enter or win the giveaway. No purchase necessary. Void where prohibited by law. This promotion is in no way sponsored, endorsed or administered by, or associated with Facebook, Instagram, Pinterest, Twitter or any other social channel mentioned in the AppleWeek posts or entry.

